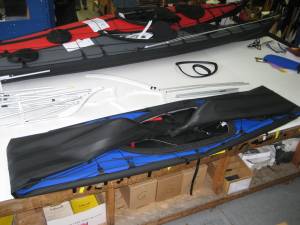
A few words here on how to best to pack away your kayak into the backpack; both to leave as much space as possible in the pack, and to make packing the bag as hassle-free as possible!
Ok, lets get started.
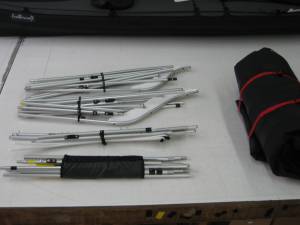
Pull the frame out of the skin and separate the frame parts into 4 piles; bow section, stern section, mid connectors/extension bars, and lever bars/coaming side arms.
Fold up the bow and stern sections and use a piece of shockcord to cinch them tight. Do the same to the loose lever bars, coaming side arms and bracing bars.
One really important part of putting away your boat is the care invested in rolling up the skin. The skin is by far the most important and expensive part of the kayak, so a little care and thought should be used when putting it away. DO NOT fold the skin. Prolonged storage in folds can leave creases in the skin that will take a while to stretch out.
 With the deck upwards, fold the ends into the cockpit.Have the red webbing straps handy for use in a moment.
Begin rolling the skin up as tight as possible from one end.
Use the two red webbing straps to cinch up the hull tight.
The frame and skin should look like this at this point, ready to pack away:
Open up the bag and place the seat into the bag against the pack-straps so that it will add a little more padding for your back. Place all the cross-ribs and hatch rims in the bag now.
Place the skin in the bag on top of the rims, hatches and seat. Place the bow frame section on one side of the skin, and the stern frame on the other. Place the remaining frame parts on top.
You should have plenty of room left in the bag for a PFD, pump and maybe a gear bag.
With boats that have longer bow and stern sections, a great idea is to protect the exposed frame with your PFD or foam. I have never experienced frame damage after a flight yet (knock on wood), perhaps due to the fact that the boats are so heavy!
Hope this helps.


Great refresher on packing the boat. I’ve always wrapped the lever & bracing bars in the seat sling (Wisper) along with the extension bars. That always left the coaming inserts on their own to be wrapped up in the spray skirt. I think I like you method a bit better. It should help protect the coaming inserts from being bent, or worse. I’ve always been a bit worried about the curved shape of the hatch insert, so I put it inside my pdf and then pack the pfd above the rolled up skin.
It’s a small thing, but thanks for the roll-not-fold tip.
Khats footpedal post helpful too.
I appreciate the blog!
CA